October 8, 2025
Show your Leopard pride with new Lafayette pumpkin stencils
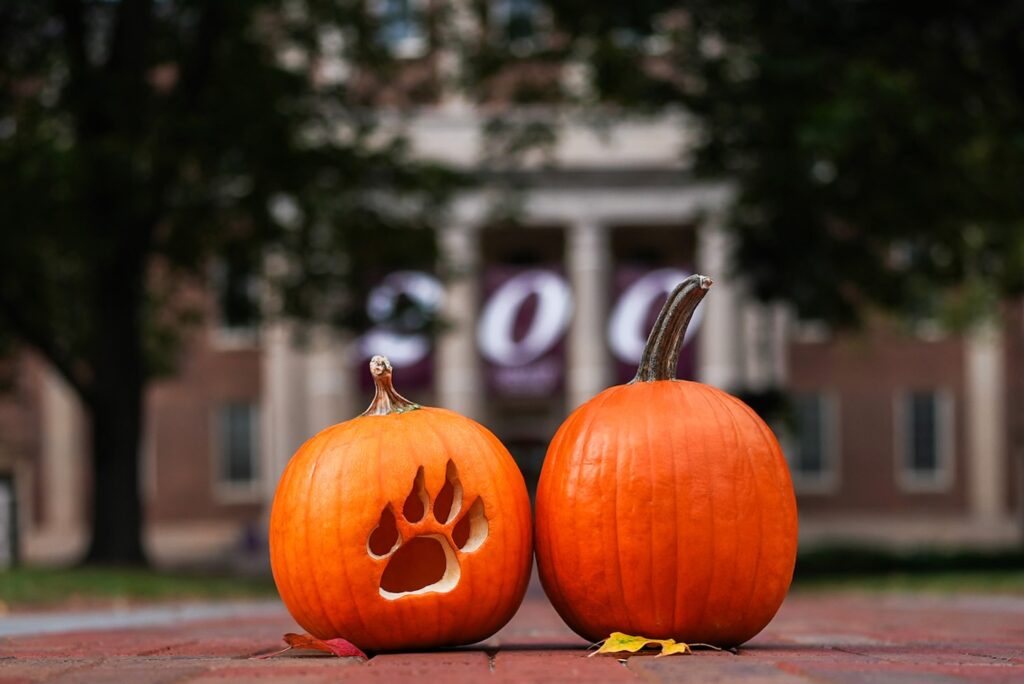
Planning a trip to the pumpkin patch over Fall Break? Or want to add a little Leopard pride to your porch?
Now you can use Lafayette stencils as you carve a pumpkin this fall!
Share a photo of your finished work in its spot on campus, or at home. Email them to today@lafayette.edu by Tues., Oct. 28, for a chance to be featured across Lafayette’s communications channels.
Pumpkin carving tips:
- Choose your pumpkin: Print out your stencil on an 8.5×11 sheet of paper. Take the stencil with you to pick the right size pumpkin.
- Prepare your pumpkin and stencil: Rinse off any dirt and clean the surface of the pumpkin before you carve. Carefully use a small paring knife or pumpkin carving tool to remove the top of the pumpkin. Use a large spoon to remove and compost pumpkin guts.
- Stick the stencil on the pumpkin: Tape the stencil to the pumpkin so it stays in place. You can trim down the paper leaving about 1/2-inch of white space around the edge of the stencil design to make this easier.
- Add a design:
To create this pawprint stencil, cut along the white lines of the stencil.
Use a small paring knife or X-acto knife to carefully trace the outline of your stencil. It is not necessary to completely cut through the pumpkin. You can cut the outline, then remove the stencil and carefully push the pieces through. Be patient as the tracing part takes some time.
- Note: For the “L”, cut the black portion of the stencil.
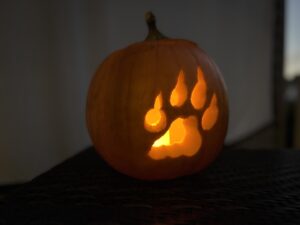
- For the pawprint: Cut along the thicker white inner lines of the stencil. (See photo)
- Finish carving: Remove your paper stencil. If you have any pieces of pumpkin that haven’t been fully removed, use your hand to carefully push them out. For smaller areas that need to be removed, you may need to make an additional diagonal cut.